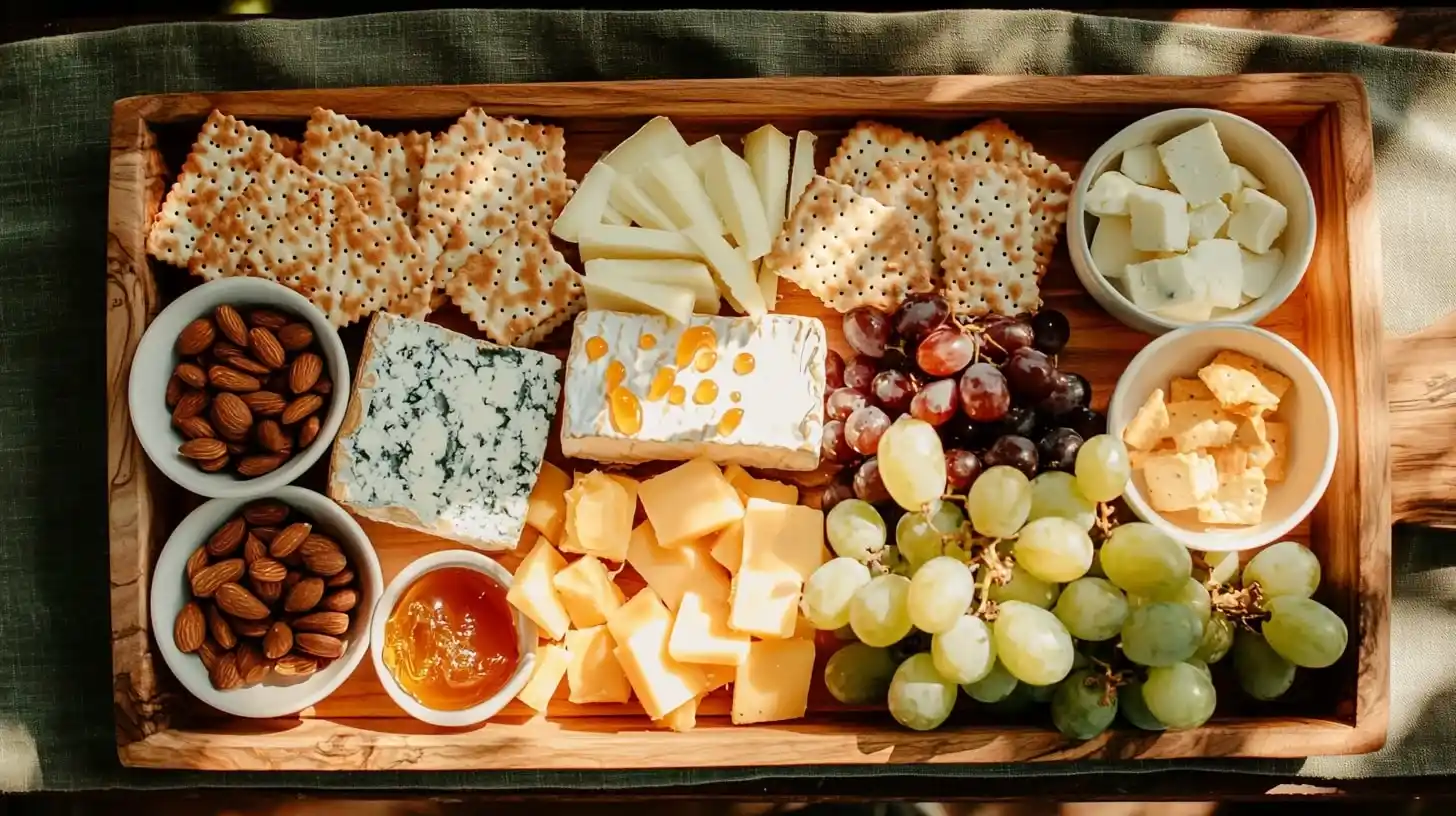
My hands trembled as I arranged cheese cubes on my mother’s serving plate. My first time hosting my husband’s colleagues, and I was terrified.
Just then, my phone rang. As if sensing my distress from four states away, it was Grandma calling from Kentucky.
“How’s the party prep going, sweetheart?” she asked in her warm drawl.
“I’m looking at the saddest cheese plate in human history,” I admitted, fighting tears.
Grandma’s soft laughter came through. “FaceTime me. Let’s fix it together.”
That 15-minute call transformed my sad Cheese and Cracker Tray plate into what my husband’s boss later called “the most beautiful spread he’d ever seen.”
Seven years later, I’m teaching my own children the art of a cheese and cracker tray perfect for any gathering – just as Grandma taught me.
Perfect Cheese and Cracker Tray
Ingredients
- For the cheese (select 3-5 varieties):
- 4 oz soft cheese (like Brie, Camembert, or goat cheese)
- 4 oz medium-firm cheese (like cheddar, Gouda, or Havarti)
- 4 oz aged or bold cheese (like blue cheese, aged Parmesan, or smoked Gouda)
- For the crackers (select 2-4 types):
- 4 oz water crackers or neutral crackers
- 4 oz flavored crackers (like rosemary, black pepper, or seeded varieties
- Optional: 4 oz breadsticks or crostini
- For fresh accompaniments:
- 1 cup mixed grapes (red and green)
- 1 apple or pear, sliced
- Optional: ½ cup berries in season
- For savory accompaniments:
- ¼ cup mixed olives
- ¼ cup nuts (like almonds, walnuts, or pecans)
- For sweet accompaniments:
- 2 tablespoons honey or fruit preserves
- Optional: 2 tablespoons dried fruits (like apricots or cranberries)
- For garnish:
- Few sprigs of fresh herbs (like rosemary or thyme)
- Special equipment:
- Serving board or large platter
- Small bowls for dips and loose items
- Cheese knives and serving utensils
Instructions
- Remove cheeses from refrigerator 30-45 minutes before serving to allow them to come to room temperature.
- While cheeses are warming, prepare fresh fruits by washing, drying, and slicing as needed.
- Select your serving board or platter. Wood, slate, or marble all work well.
- Place small bowls for olives, honey, or other loose items on the board.
- Arrange cheeses on the board, leaving space between them. Cut soft cheeses into wedges or leave with a cheese knife. Slice or cube firmer cheeses for easy serving.
- Arrange crackers in fans or stacks around the cheeses, making sure they're easily accessible.
- Fill in spaces with fruit clusters, sliced fruits, and nuts.
- Fill small bowls with olives, honey, or preserves and place on the board.
- Tuck herb sprigs around items for color and aroma.
- Provide appropriate serving utensils for each component: cheese knives for soft cheeses, small forks for pickled items, and spoons for spreads or honey
Notes
Table of Contents
Why You’ll Love This Approach to Cheese and Cracker Tray
A Cheese and Cracker Tray perfect for any occasion doesn’t require culinary training – just simple principles:
- Completely customizable to your budget
- No cooking required
- Visually impressive with minimal effort
- Easily scaled for any gathering size
- Accommodates different tastes
When my sister-in-law asked my “secret,” I shared Grandma’s wisdom: “Hospitality isn’t about perfection – it’s about making people feel welcome.”
Simple Ingredients for a Perfect Cheese and Cracker Tray
For a Cheese and Cracker Tray perfect for any occasion:

Cheese Foundation (3-5 varieties):
- 4 oz soft cheese (Brie, Camembert, goat cheese)
- 4 oz medium-firm cheese (cheddar, Gouda, Havarti)
- 4 oz aged or bold cheese (blue cheese, Parmesan, smoked Gouda)
Cracker Selection (2-4 types):
- 4 oz water crackers or neutral crackers
- 4 oz flavored crackers (rosemary, black pepper, seeded)
- Optional: breadsticks or crostini
Fresh Elements:
- 1 cup mixed grapes
- 1 apple or pear, sliced
- Optional: seasonal berries
Savory and Sweet Accents:
- ¼ cup olives
- ¼ cup nuts (almonds, walnuts, pecans)
- 2 tablespoons honey or preserves
- Optional: dried fruits
Finishing Details:
- Fresh herb sprigs
- Serving board and small bowls
- Appropriate utensils
Don’t panic if you’re missing items! When my youngest was sick and I couldn’t shop, I remembered Grandma saying: “Work with what you have.”
I used cream cheese instead of Brie and canned mandarin oranges instead of fresh fruit. The ladies raved about these “creative” combinations!
Easy Step-by-Step Assembly
1. Start with Room Temperature Cheese
Remove cheeses from refrigeration 30-45 minutes before serving.
“Cold cheese is like a person who won’t smile,” Grandma would say. “All the flavor is locked inside.”
My children hover around the counter watching the cheese as if it might perform tricks while warming.
2. Prepare Your Board and Anchors
Select your serving surface and place small bowls for loose items.
My 6-year-old daughter and I turned this into a “story” during my pregnancy bedrest – the bowls were “little lakes” where the “animals” (cheese and crackers) would gather.
This whimsical approach made assembly a creative exercise.
3. Position Your Cheeses
Arrange cheeses with space between them. Leave soft cheeses whole with a knife, pre-slice firmer varieties.
Always cut a small “starter” piece from each cheese. “It invites people in,” Grandma explained. “Nobody wants to be first to cut a perfect wedge.”
This small gesture removes that tiny social barrier.
4. Add Structure with Crackers
Arrange crackers between cheeses in fans or stacks that are easily accessible.
My son compared this to building blocks – they need to be stable but accessible. “If you destroy everything getting one piece, it’s bad design,” he observed at age 8.
I sometimes use colorful cupcake liners to contain smaller crackers and add visual interest.
5. Fill and Finish with Color and Texture
Add fruits, nuts, and accompaniments. Tuck herb sprigs as final accents.
My mother taught me herbs are more than decoration – they’re sensory cues. “We eat with our nose first, then our eyes, then our mouth.”
Letting grapes cascade slightly over the edge creates beautiful abundance without extra ingredients.
Answers to Your Cheese Tray Questions
Q: My cheese board always looks sparse. How do you make it look abundant without buying tons of expensive cheese?
Strategic arrangement creates visual fullness! When my budget was tightest after our second baby, I learned to cascade grapes over edges, fan crackers instead of stacking them, and slice cheese thinly to cover more area.
My grandmother’s Depression-era wisdom applies perfectly: “It’s not how much you have – it’s how you arrange what you have.” Using small bowls to create height variation also creates a more abundant appearance.
Q: How do I accommodate picky eaters and adventurous eaters on the same board?
Create zones! When hosting my extended family with both adventurous and cautious eaters, I design a board with what I call “comfort corners” and “adventure areas.”
My picky nephew knows he can always find plain cheddar cubes and water crackers in one section, while my food-enthusiast brother seeks out the blue cheese and fig preserve pairing in another area. Everyone feels welcomed.
Q: What’s the biggest mistake people make with cheese boards?
Serving cheese too cold! I learned this lesson the embarrassing way at our first dinner party. Even beautiful arrangement can’t compensate for cheese that hasn’t released its full flavor.
Now I set a timer to remove cheese from refrigeration 30-45 minutes before guests arrive. As Grandma said, “Patience brings out the best in cheese – and in people.”
Creating a Cheese and Cracker Tray perfect for your gathering connects you to a timeless tradition of hospitality. For more entertaining ideas, check our Cozy Breakfast Recipes and Sweet & Savory Treats.
I hope this helps you create moments of connection around your table – the true gift my grandmother gave me years ago.
With warmth, Sophia

