The first time I made homemade chocolate truffles was for my grandmother’s 80th birthday. Having grown up watching her create magic in her Kentucky kitchen, I wanted to honor her with something special yet achievable with my limited culinary skills. When I presented her with a small box of my handmade confections, her eyes misted over. “These remind me of the chocolates my mother would save for months to buy as our Christmas treat,” she whispered.
That moment taught me something profound about chocolate truffles – they carry an inherent sense of occasion, of celebration, of luxury. Yet behind that elegance lies one of the culinary world’s loveliest secrets: they’re surprisingly simple to create. Just a handful of quality ingredients transformed by patient hands into something that feels infinitely more special than the sum of its parts.
Now, whenever life calls for a touch of accessible luxury – teacher appreciation gifts, hostess offerings, or simply brightening a loved one’s difficult day – these homemade chocolate truffles are my first thought. My children have joined the tradition, tiny hands carefully rolling chocolate spheres in cocoa powder, learning as I did that the most meaningful gifts often come not from stores but from our own kitchens.
Table of Contents
Table of Contents
Why You’ll Love These Homemade Chocolate Truffles
These elegant chocolate confections have become my signature homemade gift for good reason. Here’s why they’ll become your go-to special treat as well:
- Impressive presentation: Look completely professional with minimal effort
- Customizable finish: Tailor coatings to recipient preferences for a personal touch
- Make-ahead convenience: Can be prepared days before needed
- Minimal ingredients: Create luxury from just a handful of quality components
- No special equipment: Require only basic kitchen tools
- Gift-worthy results: Present in simple boxes for meaningful handmade offerings
For more special occasion treats perfect for gifting, visit our Special Occasion Desserts: Celebration Sweets collection, which offers additional inspiration for meaningful homemade presents.
If you enjoy creating homemade versions of specialty treats, you might also love our Dill Pickle Peanut Butter Cups or our Homemade Kool-Aid Licorice Ropes for more creative kitchen projects.
Simple Ingredients for Homemade Chocolate Truffles
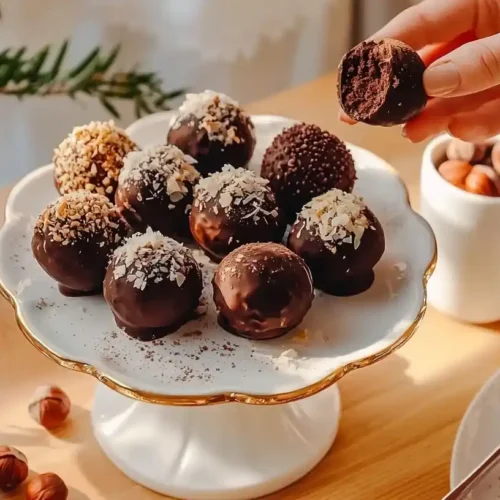
Homemade Chocolate Truffles
Ingredients
- 8 ounces high-quality dark chocolate, finely chopped (60-70% cocoa)
- 1/2 cup heavy cream
- 2 tablespoons unsalted butter, at room temperature
- 1/4 teaspoon pure vanilla extract
- Pinch of sea salt
- Unsweetened cocoa powder (for coating)
- Finely chopped nuts (hazelnuts, almonds, or pistachios) (for coating)
- Desiccated coconut (for coating)
- Chocolate sprinkles (for coating)
- Melted chocolate for dipping (optional)
Instructions
- Place finely chopped chocolate in a medium heat-proof bowl.
- In a small saucepan, heat heavy cream just until it begins to simmer around the edges. Do not boil.
- Pour the hot cream over the chopped chocolate and let it stand for 1-2 minutes.
- Gently stir the mixture with a silicone spatula or wooden spoon until the chocolate is completely melted and the mixture is smooth and glossy.
- Add room temperature butter, vanilla, and salt, stirring until fully incorporated.
- Pour the ganache into a shallow dish and allow it to cool at room temperature for about 30 minutes, then cover and refrigerate for at least 2 hours or overnight.
- When the ganache is firm but pliable, prepare your coating ingredients in separate shallow bowls.
- Line a baking sheet with parchment paper. Using a melon baller or small spoon, scoop out small portions of the ganache and quickly roll between your palms to form balls about 1-inch in diameter.
- Immediately roll each truffle in your desired coating, covering it completely.
- Place the coated truffles on the prepared baking sheet and return to the refrigerator to firm up for at least 1 hour before serving or packaging.
Notes
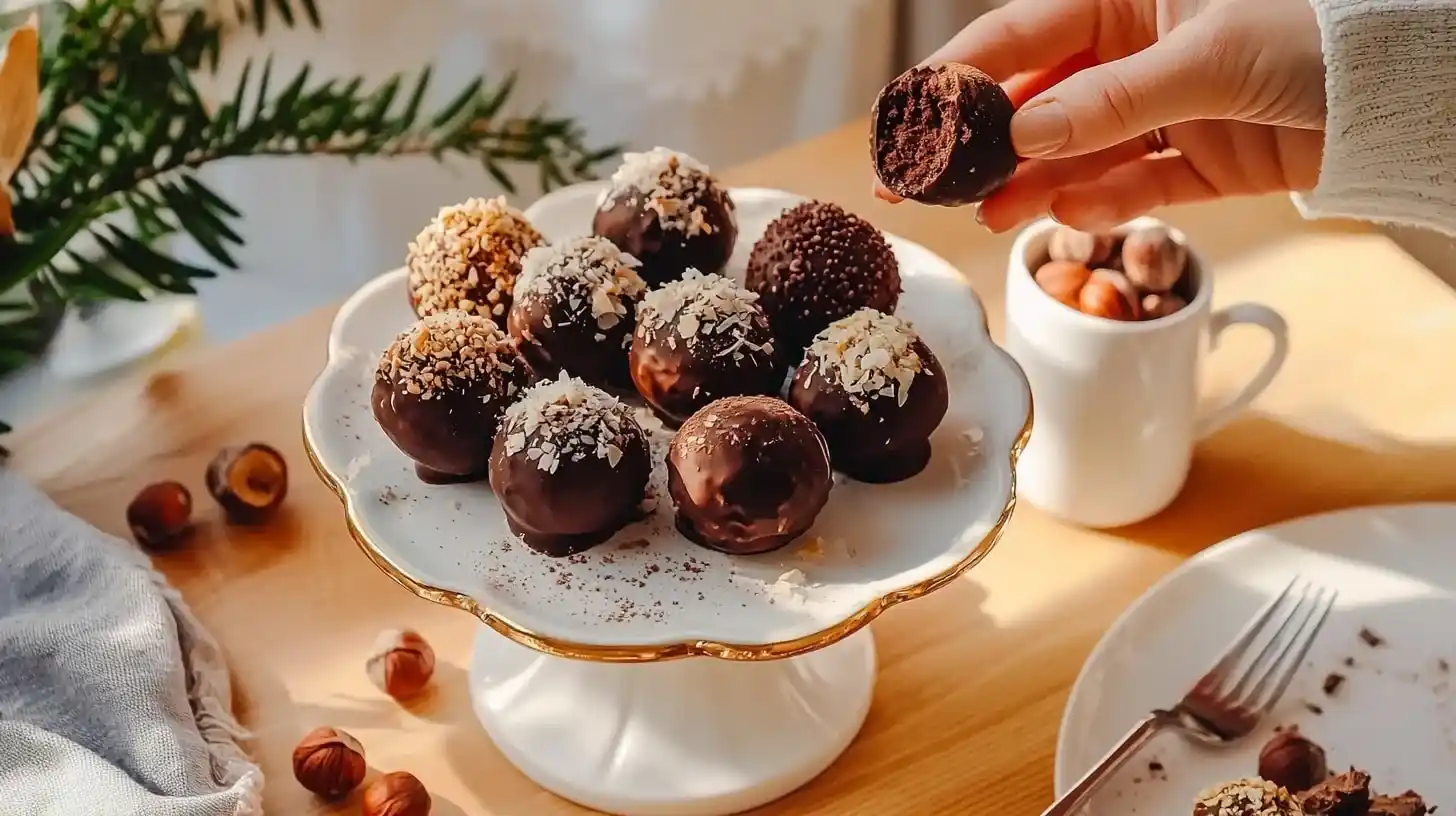
Show Image Simple, high-quality ingredients transform into decadent homemade chocolate truffles – proof that the finest desserts often require the fewest components!
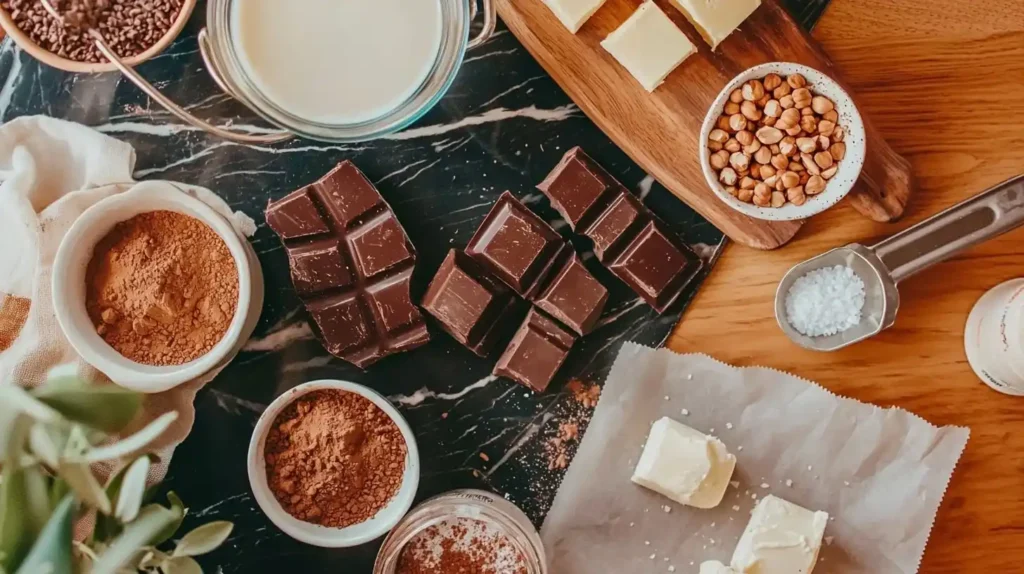
For these luxurious homemade chocolate truffles, you’ll need:
For the ganache:
- 8 ounces high-quality dark chocolate, finely chopped (60-70% cocoa)
- 1/2 cup heavy cream
- 2 tablespoons unsalted butter, at room temperature
- 1/4 teaspoon pure vanilla extract
- Pinch of sea salt
For coating options:
- Unsweetened cocoa powder
- Finely chopped nuts (hazelnuts, almonds, or pistachios)
- Desiccated coconut
- Chocolate sprinkles
- Melted chocolate for dipping
My grandmother always emphasized that when a recipe has few ingredients, their quality matters tremendously. “With chocolate,” she would say, her voice lowering as if sharing a sacred secret, “never compromise – the chocolate you begin with is the flavor you’ll end with.” This wisdom guides my truffle-making to this day.
For more chocolate indulgences that showcase quality ingredients, explore our comprehensive Homemade Dessert Recipes: Sweet Treats for Everyday Joy guide or try our Chocolate Lava Cakes for another elegant chocolate creation.
Easy Step-by-Step Preparation
- Begin by placing your finely chopped chocolate in a medium heat-proof bowl. The finer you chop the chocolate, the more quickly and evenly it will melt. My daughter calls this her “chocolate confetti” step.
- In a small saucepan, heat heavy cream just until it begins to simmer around the edges – you’ll see tiny bubbles forming. Don’t allow it to boil. This gentle heating preserves the cream’s flavor while preparing it to melt the chocolate.
- Pour the hot cream over the chopped chocolate and let it stand for 1-2 minutes. This patience allows the heat to begin melting the chocolate without stirring, preventing those dreaded streaks or separation.
- Gently stir the mixture with a silicone spatula or wooden spoon until the chocolate is completely melted and the mixture is smooth and glossy. My youngest son always volunteers for this transformative step, his eyes widening as the mixture becomes uniformly dark and shiny.
- Add room temperature butter, vanilla, and salt, stirring until fully incorporated. The butter adds a beautiful silkiness to the ganache while the vanilla and salt enhance the chocolate’s complex flavors.
- Pour the ganache into a shallow dish and allow it to cool at room temperature for about 30 minutes, then cover and refrigerate for at least 2 hours or overnight. This gradual cooling creates the perfect texture for scooping and shaping.
- When the ganache is firm but pliable, prepare your coating ingredients in separate shallow bowls. My children arrange these in a production line, taking great pride in their organized truffle-making system.
- Line a baking sheet with parchment paper. Using a melon baller or small spoon, scoop out small portions of the ganache and quickly roll between your palms to form balls about 1-inch in diameter. Work quickly as the ganache will soften from the warmth of your hands.
- Immediately roll each truffle in your desired coating, covering it completely. My daughter always chooses coconut, my eldest son prefers the classic cocoa powder, and my youngest insists on chocolate sprinkles – creating a beautiful variety.
- Place the coated truffles on the prepared baking sheet and return to the refrigerator to firm up for at least 1 hour before serving or packaging.
The entire process requires about 30 minutes of active time, plus chilling, making these homemade chocolate truffles perfect for those occasions when you want something truly special without spending hours in the kitchen.
My Best Tips for Perfect Homemade Chocolate Truffles
Through years of truffle-making for various occasions, I’ve gathered several tips that ensure consistent, professional-looking results:
For the smoothest ganache: Make sure all ingredients are at the proper temperature – chocolate chopped finely, cream hot but not boiling, and butter at room temperature. My first attempt taught me that cold butter creates a speckled rather than silky ganache.
For perfectly round truffles: Chill the ganache thoroughly before shaping, and work with small batches at a time, keeping the remainder refrigerated. My impatience once resulted in misshapen blobs rather than elegant spheres!
For more homemade gift ideas, check our No-Bake & Quick Treats: Effortless Sweet Indulgences collection or try our Raspberry Coconut Magic Bars for another impressive but simple treat.
Answers to Your homemade chocolate truffles Questions
Q: Can I use milk chocolate instead of dark chocolate? Yes, though the ganache will be softer and sweeter. If using milk chocolate, reduce the cream to 1/3 cup and increase refrigeration time. My niece prefers this sweeter version, which I make specially for her birthday each year.
Q: How long do homemade truffles last? Stored in an airtight container in the refrigerator, they keep well for up to two weeks. Allow them to come to room temperature for about 15 minutes before serving for the best flavor and texture. Though in our household, they rarely last beyond a few days!
For more chocolate dessert options, try our Chocolate Lasagna Recipe or explore our Chocolate Covered Cherry Rice Krispies Treat for more chocolate indulgence.
Homemade Chocolate Truffles: Everyday Luxury Made Simple
There’s something profoundly satisfying about creating something that appears so luxurious from ingredients so simple. These truffles, with their velvety centers and various coatings, look like they’ve come from an expensive chocolate shop, yet they emerge from our own kitchens with relatively little effort.
Last Christmas, my now-teenage son surprised me by making a batch of these truffles entirely on his own. As he presented me with a small box tied with ribbon, I recognized the full-circle moment – the tradition passing to the next generation. “I wanted to make something that felt special,” he explained, unknowingly echoing my own words from years earlier.
My grandmother used to say that the best gifts come not from stores but from our hands and hearts. These homemade chocolate truffles embody that philosophy perfectly – a simple act of kitchen alchemy that transforms everyday ingredients into something that feels like celebration, like luxury, like love.
I hope these truffles bring as much joy to your kitchen and to your gift-giving as they have to mine. May they help you create moments of sweetness and connection in a world that always needs more of both.
With warmth, Sophia
for more recipes follow me in facebook and pinterest and twitter

