My love affair with chocolate covered potato chips began when I was pregnant with my first child. During that intense craving phase, I sent my bewildered husband to three different stores at 10 PM searching for this sweet-salty snack. When he returned empty-handed but determined to please, we decided to try making them ourselves with the potato chips and chocolate already in our pantry.
That late-night experiment turned into one of our favorite family traditions. My children now request these treats for special movie nights, and making them together has become as enjoyable as eating them. I’ve perfected how to make chocolate covered chips over the years, discovering that this simple treat requires just a few tricks to transform from good to absolutely irresistible.
Perfect Homemade Chocolate Covered Potato Chips
Ingredients
- 8 ounces high-quality chocolate (dark, milk, or white)
- 1 tablespoon coconut oil or shortening (optional, helps with smoother dipping)
- 8 ounces thick, ridged potato chips (about half a standard bag)
- Optional toppings: sea salt, crushed nuts, sprinkles, or crushed candy
- Optional: 2 ounces contrasting chocolate for drizzling
Instructions
- Line a large baking sheet with parchment paper. Select sturdy, unbroken potato chips and arrange them ready for dipping
- Break chocolate into small pieces and place in a microwave-safe bowl with coconut oil (if using).
- Microwave in 30-second intervals at 50% power, stirring between each interval, until just melted and smooth. Be careful not to overheat.
- Alternatively, use a double boiler by placing the chocolate in a heat-safe bowl over a pot of simmering (not boiling) water. Stir until melted.
- Hold a potato chip by one end and dip partly or fully into the melted chocolate. Gently tap to remove excess chocolate.
- Place dipped chips on the prepared baking sheet. Add any desired toppings immediately before the chocolate sets.
- If making drizzled chips, melt contrasting chocolate and drizzle over the dipped chips using a fork or piping bag.
- Allow chips to set completely at cool room temperature (or refrigerate for 10-15 minutes for faster setting).
- Once set, carefully remove from parchment paper and arrange on a serving plate or store in an airtight container.
Notes
Table of Contents
Table of Contents
Why You’ll Love These Chocolate Covered Chips
This recipe for how to make chocolate covered chips at home will quickly become a family favorite. Here’s why these treats deserve a place in your snack rotation:
- Perfect sweet-salt balance creates an addictive flavor combination that pleases everyone
- Quick preparation takes just 15 minutes of active time with no baking required
- Versatile recipe allows endless customization with different chocolates and toppings
- Impressive presentation makes them perfect for gifts or entertaining
- Easy enough for children to help create while learning kitchen skills
My mother always said the best recipes combine simplicity with a touch of indulgence. Learning how to make chocolate covered chips captures that philosophy perfectly – a humble snack transformed into something special with minimal effort.
Simple Ingredients for Perfect Results
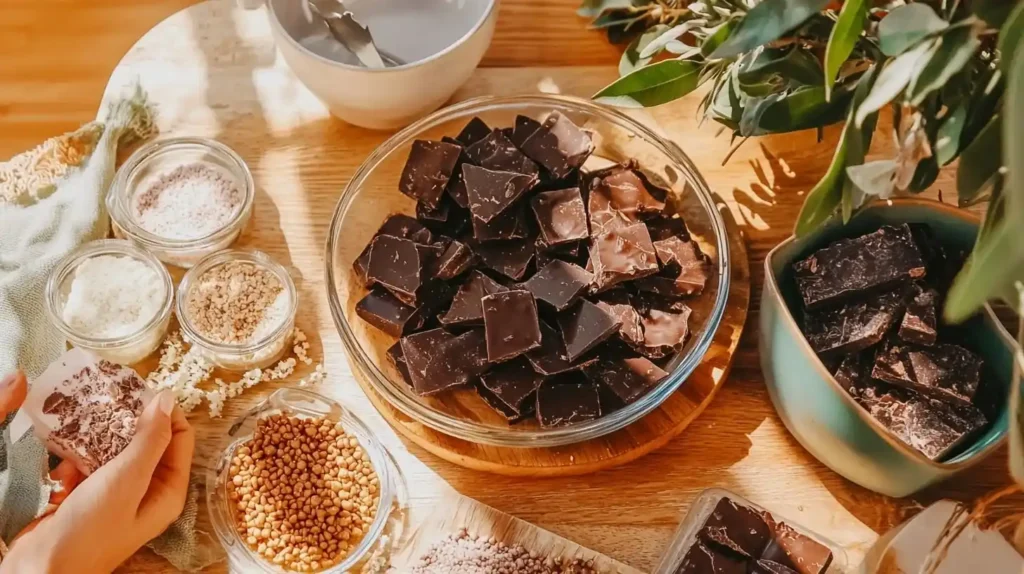
To master how to make chocolate covered chips at home, you’ll need just a few quality ingredients:
- 8 ounces high-quality chocolate (dark, milk, or white)
- 1 tablespoon coconut oil or shortening (optional, helps with smoother dipping)
- 8 ounces thick, ridged potato chips (about half a standard bag)
- Optional toppings: sea salt, crushed nuts, sprinkles, or crushed candy
- Optional: 2 ounces contrasting chocolate for drizzling
The key to successful chocolate covered chips lies in ingredient selection. For the chips, choose sturdy, ridged varieties that won’t break during dipping. My grandmother taught me that quality matters most where you have fewest ingredients, so I recommend using the best chocolate you can reasonably afford – it truly makes a difference in the final flavor.
When my daughter asked why the chocolate needs oil when learning how to make chocolate covered chips, I explained that it creates a smoother consistency and thinner coating that sets with the perfect snap. These little details transform a simple treat into something special.
Easy Step-by-Step Preparation
- Prepare your workspace. Line a large baking sheet with parchment paper. Select sturdy, unbroken potato chips and arrange them ready for dipping. My son loves helping with this quality control step, though I’ve noticed our “broken chip bowl” mysteriously empties during the process!
- Melt the chocolate. Break chocolate into small pieces and place in a microwave-safe bowl with coconut oil (if using). Microwave in 30-second intervals at 50% power, stirring between each interval, until just melted and smooth. Be careful not to overheat.
- Master the dipping technique. Hold a potato chip by one end and dip partly or fully into the melted chocolate. The first time my daughter tried this step in our how to make chocolate covered chips lesson, she submerged her entire hand along with the chip! Now she’s our family expert, gently tapping excess chocolate off with perfect precision.
- Add toppings immediately. Place dipped chips on the prepared baking sheet. Add any desired toppings before the chocolate sets. Working quickly is key – my husband operates our household “topping station” with military precision.
- Let them set properly. Allow chips to set completely at cool room temperature or refrigerate for 10-15 minutes for faster setting. The patience this step requires has taught my children valuable lessons in delayed gratification!
The entire process of how to make chocolate covered chips takes about 15 minutes of active time plus 30 minutes for setting – perfect for busy families seeking special treats without extended kitchen commitments.
My Best Tips for Chocolate Dipping Success
After many batches of chocolate covered chips (including some memorable failures!), I’ve gathered essential wisdom to share:
Choose the right chips. Thicker, ridged potato chips withstand dipping better than thin, flat varieties. My family discovered this the hard way when learning how to make chocolate covered chips – starting with overly delicate chips led to a bowl of tasty but disappointing chocolate-covered crumbs!
Temperature matters. Keep your melted chocolate warm but not hot. If it cools and thickens while working, briefly reheat at 50% power in the microwave. My grandmother’s wisdom about chocolate being “temperamental like a toddler” proves true every time we make these treats.
Control humidity. For the crispiest results when mastering how to make chocolate covered chips, choose a day with low humidity. On particularly muggy summer days, we store our finished chips in the refrigerator to maintain their perfect texture.
Embrace imperfection. Each chocolate covered chip will be unique – that’s part of their homemade charm! When my perfectionist daughter worried about uneven coverage, I reminded her that these delightful irregularities tell the story of hands that made them with love.
Answers to Your Chocolate Covered Chip Questions
Q: How do I keep the chips crispy when making chocolate covered chips?
The secret to maintaining crispness when learning how to make chocolate covered chips is working with completely dry chips and not allowing any moisture near your cooling treats. I store finished chips in a single layer with parchment between layers if stacking is necessary. For extra insurance against humidity, add a silica gel packet (saved from other food packages) to your storage container.
Q: Can I use different types of chips or chocolate?
Absolutely! The basic technique for how to make chocolate covered chips works with many variations. We’ve successfully used kettle-cooked, ridged, and even flavored chips like barbecue or salt and vinegar. For the chocolate, anything that melts well works beautifully – dark chocolate with sea salt is my husband’s favorite, while my children prefer milk chocolate with rainbow sprinkles.
Q: How long do homemade chocolate covered chips last?
When stored properly in an airtight container at cool room temperature, your chocolate covered chips will maintain their quality for up to 3 days. In our house, however, the question of storage duration is purely theoretical – they rarely survive beyond 24 hours! If you enjoy these sweet-salty treats, you might also love our Sweet & Savory Treats: Special Breakfast Indulgences for more delicious contrasting flavors.
Q: How can I make these for gift-giving?
Homemade chocolate covered chips make wonderful gifts! Once you’ve mastered how to make chocolate covered chips, package them in cellophane bags tied with ribbon, or in decorative tins lined with parchment paper. For a special touch, customize the chocolate and toppings to the recipient’s tastes. These treats have become our standard homemade gift for teachers and neighbors during the holidays.
Learning how to make chocolate covered chips has brought our family countless hours of kitchen fun and delicious rewards. If you’re looking for more family-friendly recipes, check out our Cozy Breakfast Recipes: Effortless Morning Meals or our recipe for Homemade Peanut Butter Pretzels – another sweet-salty favorite!
I hope this simple treat brings your family as much joy as it has brought to ours. There’s something magical about transforming everyday potato chips into something special – a reminder that sometimes the most delightful pleasures come from unexpected combinations.
With warmth, Sophia

