The afternoon I brought a homemade vegetable tray to my daughter’s dance recital potluck changed my reputation among the other mothers. “You made this yourself?” one asked, examining the colorful arrangement with genuine surprise. “I always just grab the pre-made ones from the grocery store.” Her comment reminded me how something so simple can seem intimidating when we overthink it.
My grandmother taught me to arrange vegetables during my childhood summers in Kentucky, though she never called it a “vegetable tray” – it was simply “putting out the garden” before Sunday family gatherings. With her patient guidance, I learned that a beautiful arrangement requires no special skill, just thoughtful placement and fresh ingredients.
This versatile offering has become my signature contribution to family gatherings, team celebrations, and quiet weeknight dinners when I want to increase our vegetable consumption without a battle. The beauty of the vegetable tray lies in its simplicity – requiring minimal preparation while maximizing visual impact and nutritional value.

Vegetable Tray: Easy, Fresh Options for Family Gatherings
Ingredients
- 1 pint cherry or grape tomatoes
- 2 large bell peppers (preferably different colors: red, yellow, or orange)
- 1 English cucumber or 2 regular cucumbers
- 1 bunch of carrots or 1 bag baby carrots
- 1 head of broccoli
- 1 head of cauliflower (white or purple if available)
- 1 bag of sugar snap peas
- 1 cup sour cream
- 1/2 cup mayonnaise
- 1 tablespoon dried parsley
- 1 teaspoon dried dill
- 1/2 teaspoon garlic powder
- 1/2 teaspoon onion powder
- 1/4 teaspoon salt
- 1/8 teaspoon black pepper
- Splash of lemon juice
Instructions
- Prepare the homemade ranch dip by combining sour cream, mayonnaise, dried parsley, dried dill, garlic powder, onion powder, salt, pepper, and a splash of lemon juice in a bowl. Stir until well incorporated.
- Wash all vegetables thoroughly under cold running water. For added cleaning power, add a splash of vinegar to the washing water.
- Cut bell peppers into strips approximately 1/2 inch wide, removing seeds and membranes.
- Slice cucumber into 1/4-inch rounds. For regular cucumbers, consider creating a decorative edge by running a fork down the sides before slicing.
- Prepare carrots by peeling and cutting into sticks about 3 inches long, or simply open your bag of baby carrots.
- Cut broccoli and cauliflower into bite-sized florets, ensuring no piece is larger than two bites.
- Arrange your serving platter and place the dip bowl in the center.
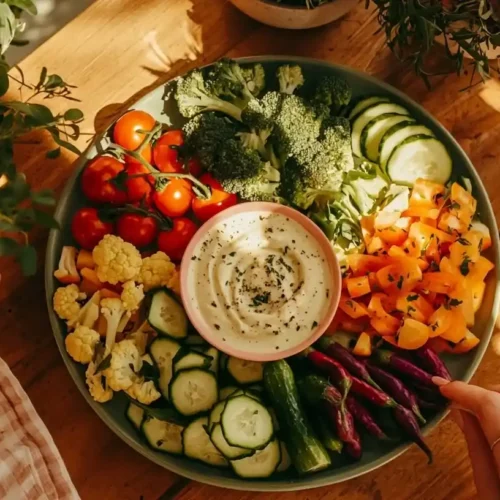
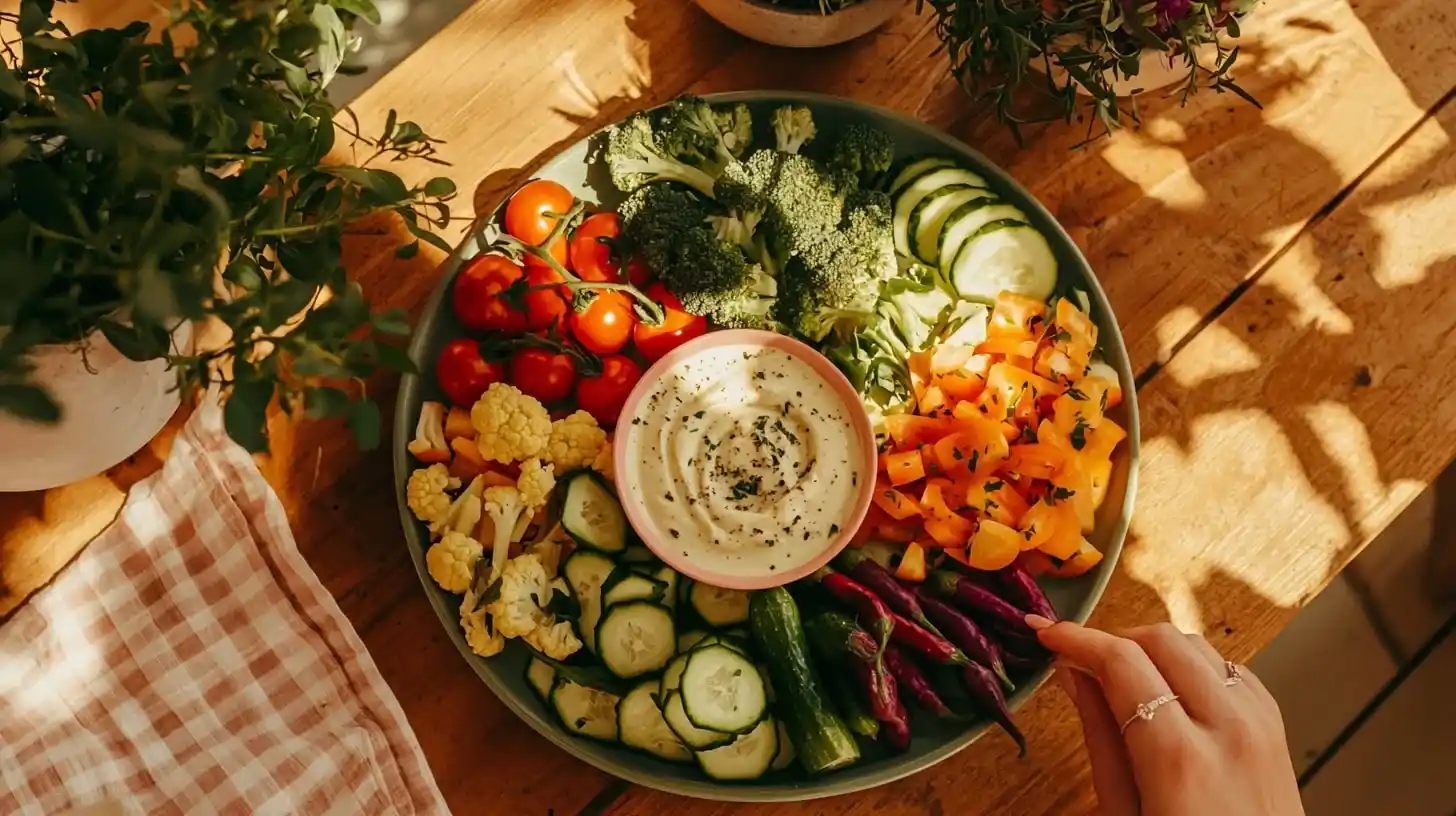
- Arrange vegetables in a rainbow pattern radiating from the center, grouping colors together: red (tomatoes, red peppers), orange (carrots), yellow (yellow peppers), green (cucumber, broccoli, snap peas), purple (purple cauliflower if available).
- For added visual interest, create height variation by leaning some vegetable pieces against the dip bowl or slightly stacking certain vegetables.
- Keep refrigerated until approximately 30 minutes before serving to maintain maximum freshness.
Notes
Table of Contents
Why You’ll Love This Vegetable Tray
This approach to vegetable trays has remained a crowd-pleaser for good reason:
- Effortless elegance: Creates a stunning presentation with minimal effort
- Nutritious alternative: Provides healthy options amidst typically heavy gathering foods
- Make-ahead friendly: Most components can be prepared up to 24 hours in advance
- Budget-conscious: Much more economical than pre-made trays
For more colorful, nutritious options that delight the eye and palate, visit our Fresh & Vibrant Lunch Ideas: Colorful & Nutritious Options collection. You might also enjoy our Family-Friendly Lunch Recipes: Effortless Meals for Busy Parents for additional simple yet satisfying ideas.
Simple Ingredients for Perfect Vegetable Trays
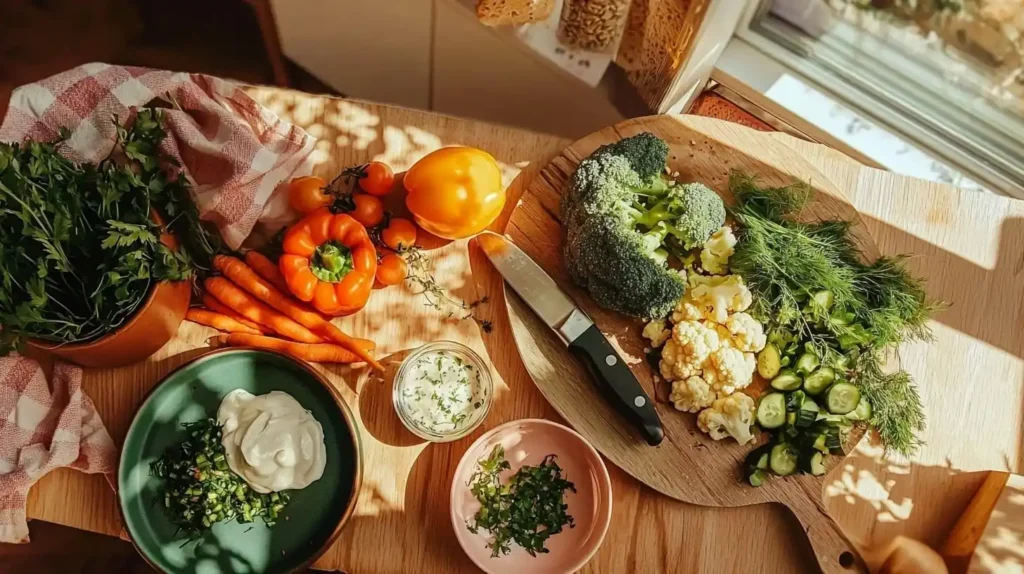
Show Ingredients Image Simple, fresh ingredients transform into a stunning vegetable tray – proving that beautiful entertaining doesn’t require complicated components!

For a crowd-pleasing vegetable tray, you’ll need:
For the vegetable selection:
- 1 pint cherry or grape tomatoes
- 2 large bell peppers (ideally different colors)
- 1 English cucumber or 2 regular cucumbers
- 1 bunch of carrots (or 1 bag of baby carrots)
- 1 head of broccoli
- 1 head of cauliflower (regular or colored variety)
- 1 bag of sugar snap peas
For the homemade ranch dip:
- 1 cup sour cream
- 1/2 cup mayonnaise
- 1 tablespoon dried parsley
- 1 teaspoon dried dill
- 1/2 teaspoon garlic powder
- 1/2 teaspoon onion powder
- 1/4 teaspoon salt
- 1/8 teaspoon black pepper
- Splash of lemon juice
My grandmother always said, “The vegetable tray should be a garden tour on a plate.” This wisdom guides my selection process, prioritizing color variety and freshness over quantity. When considering the economic aspect of homemade versus store-bought options, Is it cheaper to make or buy a veggie tray? offers a detailed analysis that has influenced my approach.
If you’re wondering about specific preparation details, such as Do I peel cucumbers for a veggie tray?, the answer depends on the cucumber type – I leave the skin on English cucumbers for their attractive color while creating a striped pattern on regular cucumbers by partially peeling them.
Easy Step-by-Step Preparation
- Prepare the dip by combining all dip ingredients in a bowl, stirring until well incorporated. My middle child claims stirring authority, insisting on “exactly 27 stirs” for the perfect consistency – a kitchen superstition I’ve come to honor.
- Wash all vegetables thoroughly. My grandmother taught me to add a splash of vinegar to the washing water, a habit I maintain without knowing if it actually makes a difference.
- Cut bell peppers into strips about 1/2 inch wide, removing seeds and membranes. My oldest daughter prefers to cut them into squares instead, claiming they “hold more dip that way” – a valid perspective I often accommodate.
- Slice the cucumber into 1/4-inch rounds. If using regular cucumbers, you might want to create a decorative edge by running a fork down the sides before slicing, a trick my grandmother showed me that delights children.
- Prepare carrots by peeling and cutting into sticks about 3 inches long, or simply open your bag of baby carrots. My youngest insists the “baby” carrots taste sweeter, though we all know they’re simply regular carrots cut down.
- Cut broccoli and cauliflower into bite-sized florets. My husband is particular about these being “two-bite maximum” pieces – wisdom gained from watching guests navigate too-large florets at parties.
- Place your dip bowl in the center of your serving platter. “The dip is the heart of the tray,” my grandmother would say, “everything else revolves around it.”
- Arrange vegetables in a pattern radiating from the center bowl. The rainbow approach works beautifully – red tomatoes and peppers, orange carrots, yellow peppers, green broccoli and cucumber, purple cauliflower.
- For those wondering about terminology when presenting a particularly elegant arrangement, What is a fancy vegetable tray called? explains the term “crudités” (pronounced kroo-dee-TAY) – a French word that simply means raw vegetables but sounds impressively sophisticated.
The entire preparation takes about 30 minutes, making this perfect for busy hosts who want to create something special without spending hours in the kitchen.
My Best Tips for Perfect Vegetable Trays
Through countless gatherings and vegetable trays, I’ve gathered several tips for success:
For the freshest presentation: Cut vegetables no more than 24 hours in advance and store properly. Carrots and celery should be stored fully submerged in water, while peppers and cucumbers do better with paper towel protection in airtight containers. My first disastrous vegetable tray featured limp carrots and dried-out cucumbers – a lesson in timing I’ve never forgotten.
For the most appealing arrangement: Create height variation by leaning some vegetable pieces against the dip bowl or stacking certain vegetables. My sister taught me this photography trick that makes vegetable trays look more abundant and inviting.
For stress-free transportation: If bringing to an event, transport the prepared vegetables and dip separately in airtight containers, then arrange at your destination. My husband calls this my “mobile catering technique” after witnessing the tragic sliding of a fully-arranged tray during a sharp turn en route to a potluck.
For more comprehensive meal planning that incorporates beautiful vegetable presentations, explore our Family-Friendly Lunch Recipes: Effortless Meals for Busy Parents collection.
Answers to Your Vegetable Tray Questions
Q: How do I keep cut vegetables fresh on the tray during a longer event? Keep your vegetable tray refrigerated until about 30 minutes before serving, and consider placing the tray over a larger bowl of ice for extended events. My grandmother’s method was simpler but effective – she would prepare backup containers of cut vegetables to refresh the tray halfway through longer gatherings.
Q: What vegetables should I avoid putting on a veggie tray? Vegetables that brown quickly (like avocado) or release excessive moisture (like sliced tomatoes) can compromise presentation over time. My first vegetable tray featured sliced avocado that turned an unappetizing brown within an hour – a mistake I’ve never repeated since discovering the time-tested vegetable options listed above.
Vegetable Trays: Simple Beauty for Any Gathering
There’s something deeply satisfying about the contrast between the minimal effort required to create a vegetable tray and the significant impact it has on any gathering. When my middle child went through a phase of vegetable resistance, I noticed her willingly taking cucumber slices and cherry tomatoes from our vegetable trays while refusing the same foods on her dinner plate.
My Kentucky grandmother understood this connection between presentation and enjoyment long before research confirmed it. “People eat first with their eyes,” she’d remind me as we arranged sliced vegetables in patterns around her homemade dips. This wisdom feels especially relevant in our modern world of beautiful food photography and social media sharing.
I hope this approach to vegetable trays brings as much joy to your gatherings as it has to mine. In our complicated, busy world, there’s profound satisfaction in creating something both beautiful and nourishing with such remarkable simplicity.
With warmth, Sophia


